Customer Portal: How to Enable an Existing Contact
Odoo offers a dedicated area (the Portal) where your customers can log in autonomously to view, sign, or pay their quotations, check delivery statuses, download invoices, and manage their personal information.
This practical, step-by-step guide explains how to convert a contact already present in your database into an enabled portal user.
1. Accessing the Contact Record
The first step is to locate the contact you wish to enable.
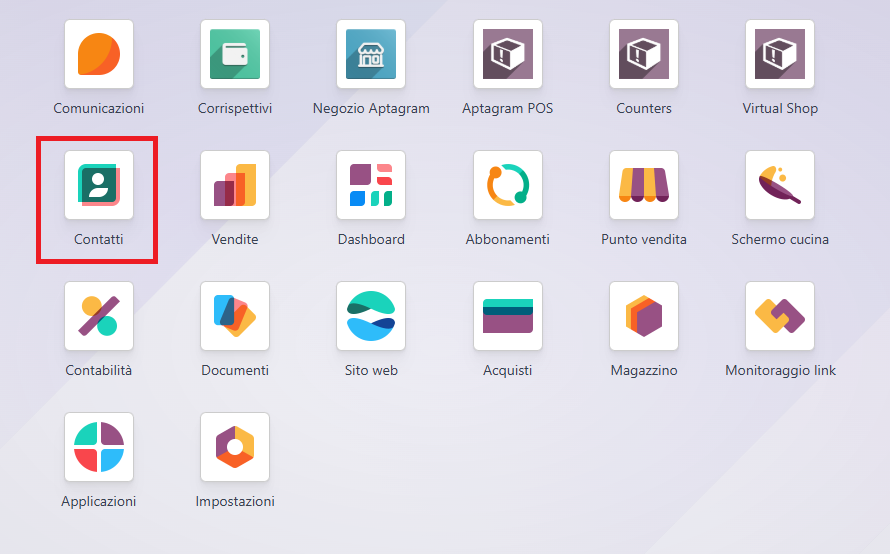
- Go to the Contacts module (or Sales > Customers).
- Use the search bar in the top right to find the customer (e.g., by entering their name, company, or email address).
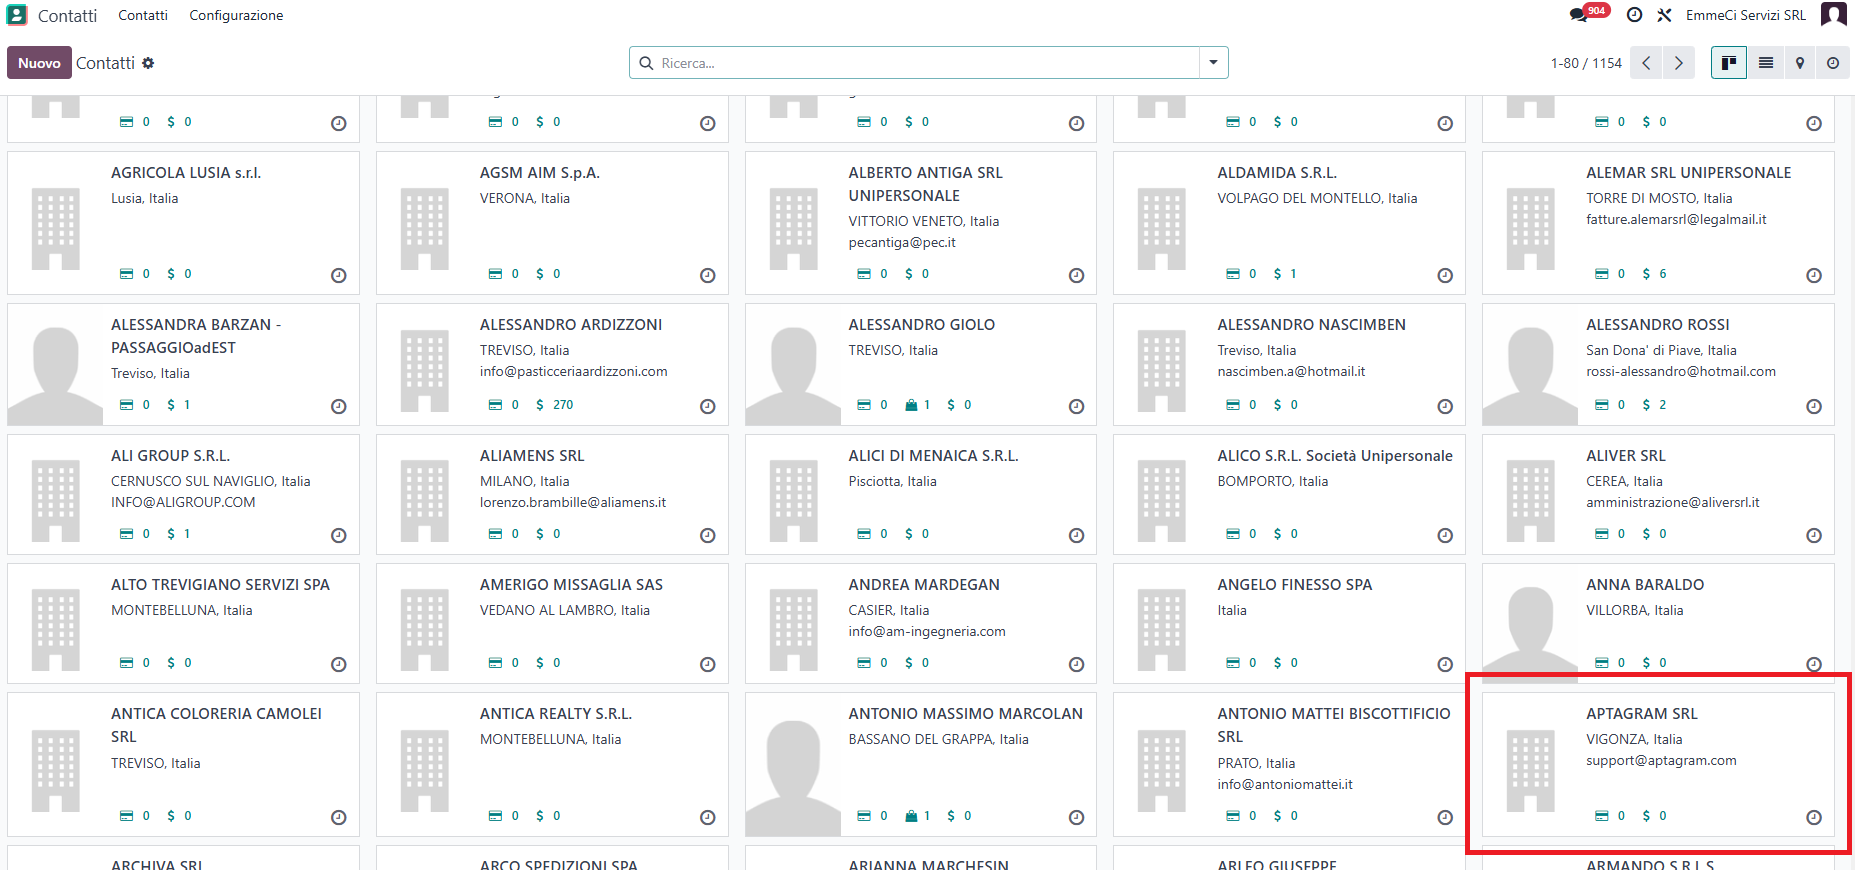
- Click on the contact card to open their details.
⚠️ IMPORTANT: Before proceeding, make sure a valid email address is entered in the contact's Email field. The email is a strict requirement: it will serve as both their login username and the destination for the activation link.
2. Activating Portal Access
Once inside the contact form:
-
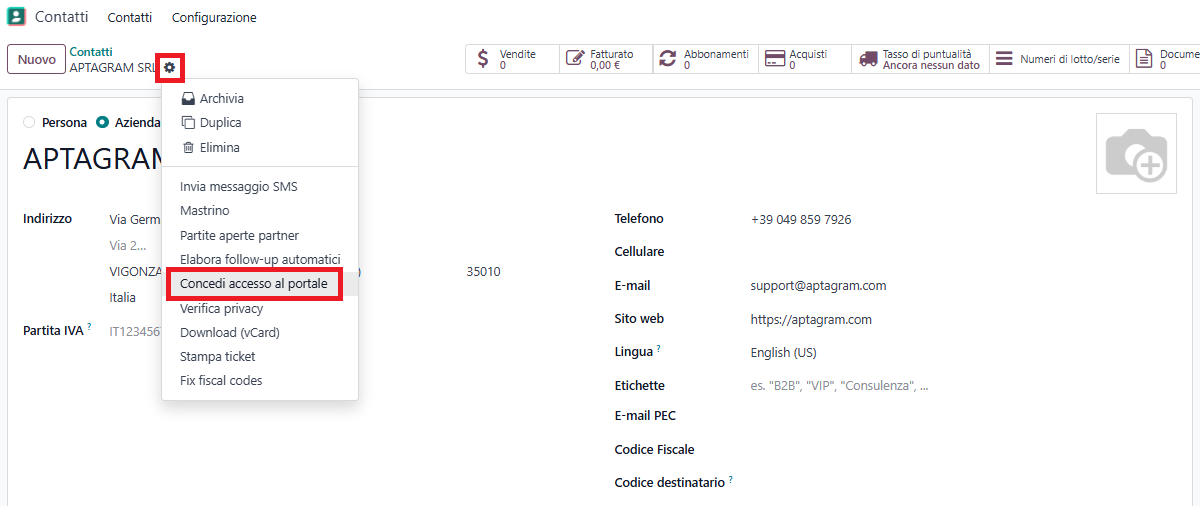
In the top left, click the button with the Gear icon.
-
Select the option Concedi accesso portale (Portal Access Management).
3. Configuring and Enabling the User
A pop-up window titled "Gestione accessi al portale" (Portal Access Management) will open. This screen displays the selected contact and any associated contacts.
Within this screen, follow these steps to grant access:
- Check that the E-mail address shown in the contact's row is correct and valid. If necessary, you can modify it directly in this table.
- (Optional) If you wish to add a custom message at the end of the invitation email, you can write it in the upper text field ("Questo testo è incluso alla fine dell'e-mail...").
- To enable the user, locate the contact's row and click the Concedi accesso (Grant Access) button on the right.
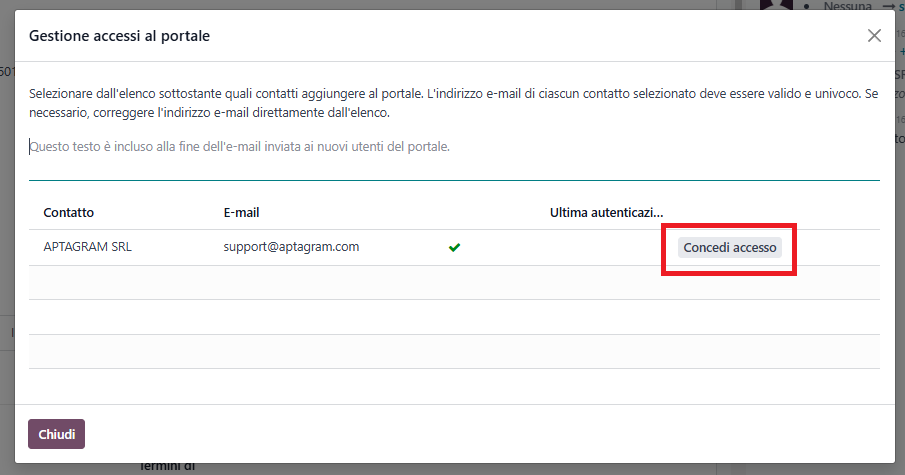
- Once access is granted, the interface will update to confirm that the invitation has been sent. When finished, click the Chiudi (Close) button in the bottom left.
4. What Happens on the Customer's Side? (Activation)
After clicking Concedi accesso, Odoo will send an automated email to the customer with text similar to this:
"Dear [Customer Name], your account to access our portal is ready. Click the following link to set up your password and log in..."
The customer simply needs to: 1. Click the link received in the email. 2. Choose and confirm a personal password. 3. Click Conferma (Confirm).
From that moment on, they will be able to access their reserved area by navigating to your company's Odoo database URL (e.g., https://yourcompany.odoo.com/my) and entering their email and chosen password.
5. How to Verify User Status or Reset Passwords
If a customer forgets their password or experiences login issues, you can intervene directly to assist them:
- Verify if active: If the user has completed registration, you can find them under Settings > Users & Companies > Users by filtering for "Portal Users".
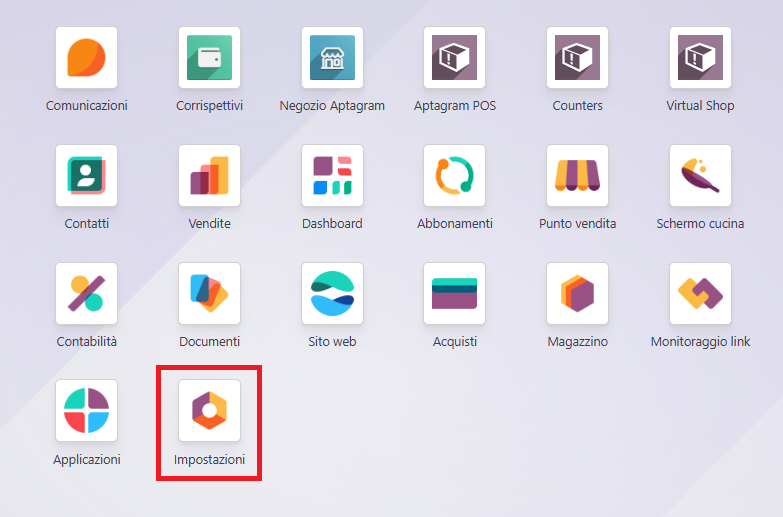
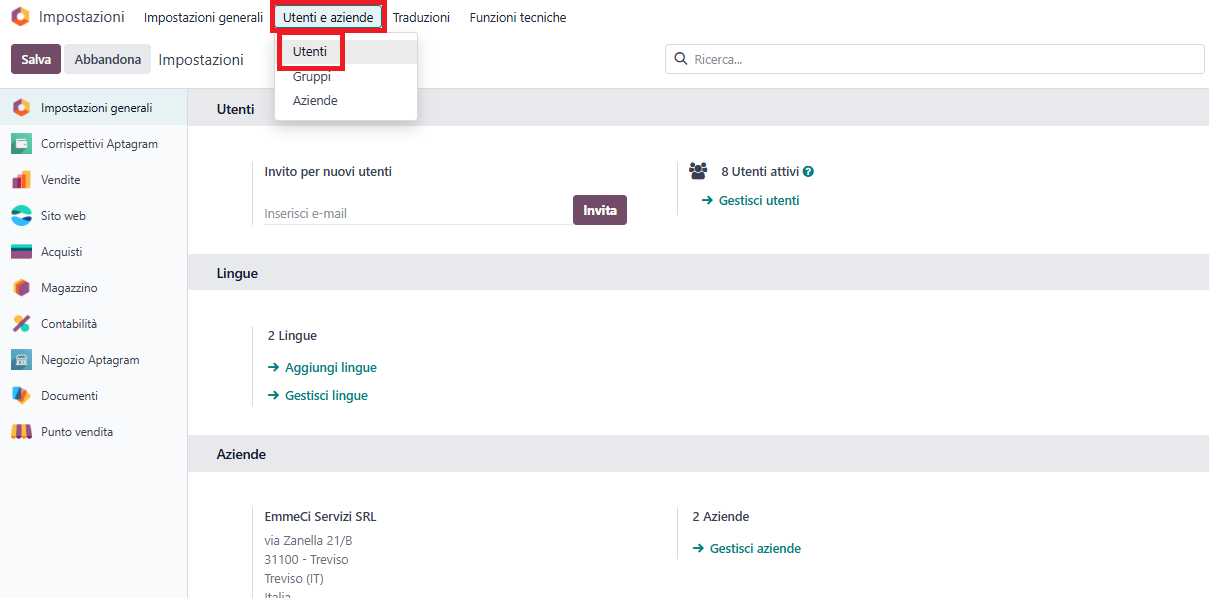
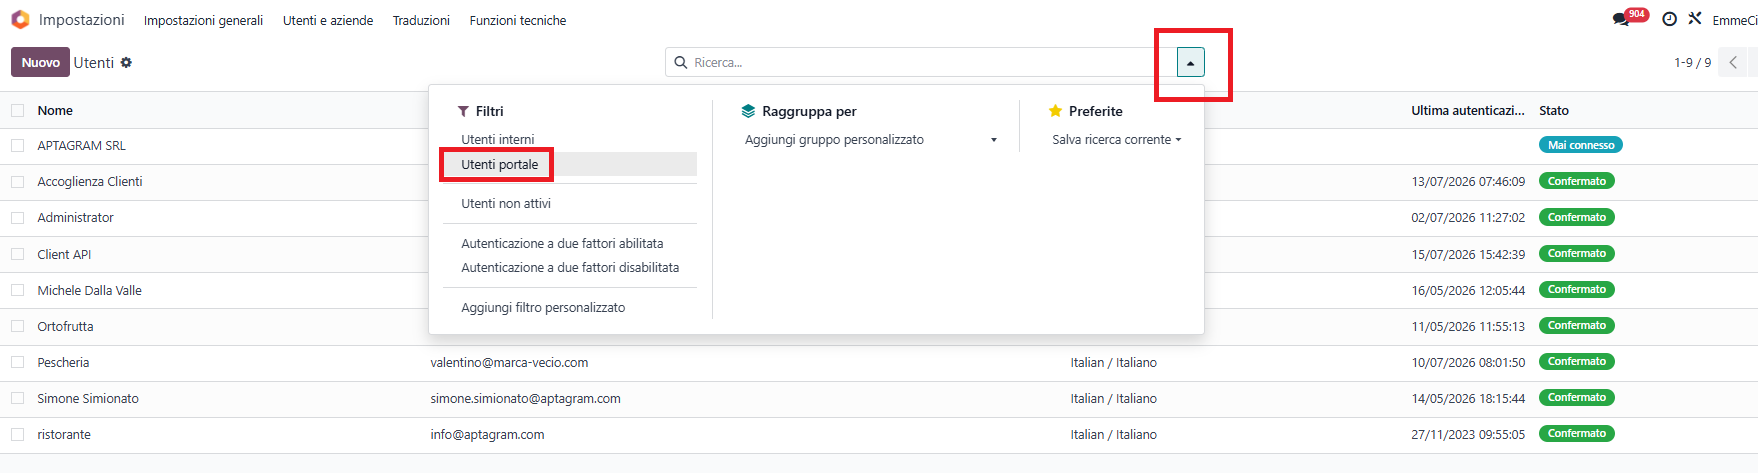
- Resend invitation: If the customer did not receive the email or the link expired, simply click the Invia e-mail di invito (Send Invitation Email) button to force a new email dispatch.
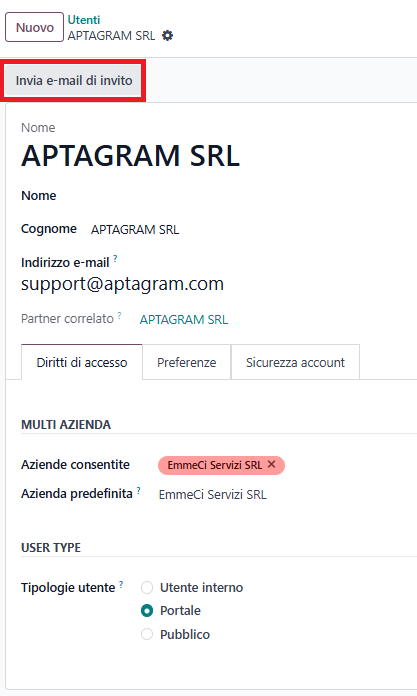
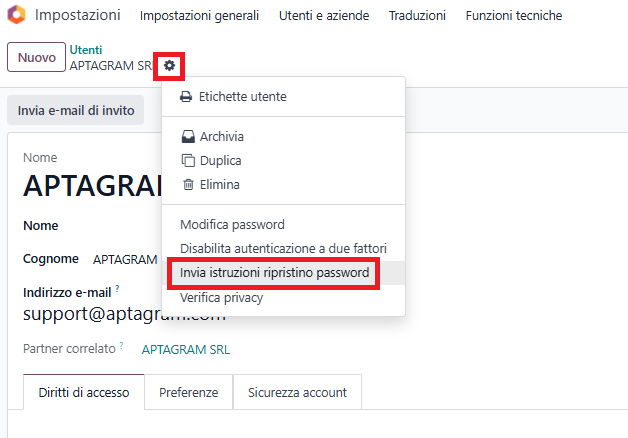
- Send password reset: From the contact form, under the Azione (Action) button, you can click Invia istruzioni per il ripristino della password (Send Password Reset Instructions) to let them set a new password completely on their own.